Blog
 Kyle
KyleIf you've already configured a custom domain for your Shopify store, you might still encounter a warning in your Shopify admin stating:
"Change order status page domain
Your order status page is using the default URL. Change the domain to a subdomain of (your domain name)"
This message indicates that while your main store domain is set up, the customer account pages (like login, order history, and profile pages) are still using Shopify's default domain. To provide a seamless and branded experience for your customers, it's essential to customize the domain for these account pages as well.
In this guide, we'll walk you through the steps to connect a third-party domain to your Shopify customer account pages, ensuring consistency across your store.
Step 1: Add a CNAME Record in Your Domain Provider’s Settings
Begin by logging into your third-party domain provider account (such as GoDaddy, Namecheap, or Google Domains).
Access DNS Settings: Navigate to the DNS settings or domain management section.
Create a New CNAME Record:
Host Name: Enter the subdomain you wish to use for customer accounts (e.g., account).
Point the CNAME to: shops.myshopify.com.
Save Changes: Ensure you save the new record.
After saving, return to your Shopify admin's Connect existing domain page.
Step 2: Check DNS Propagation
DNS changes can take up to 48 hours to propagate fully. To monitor the progress:
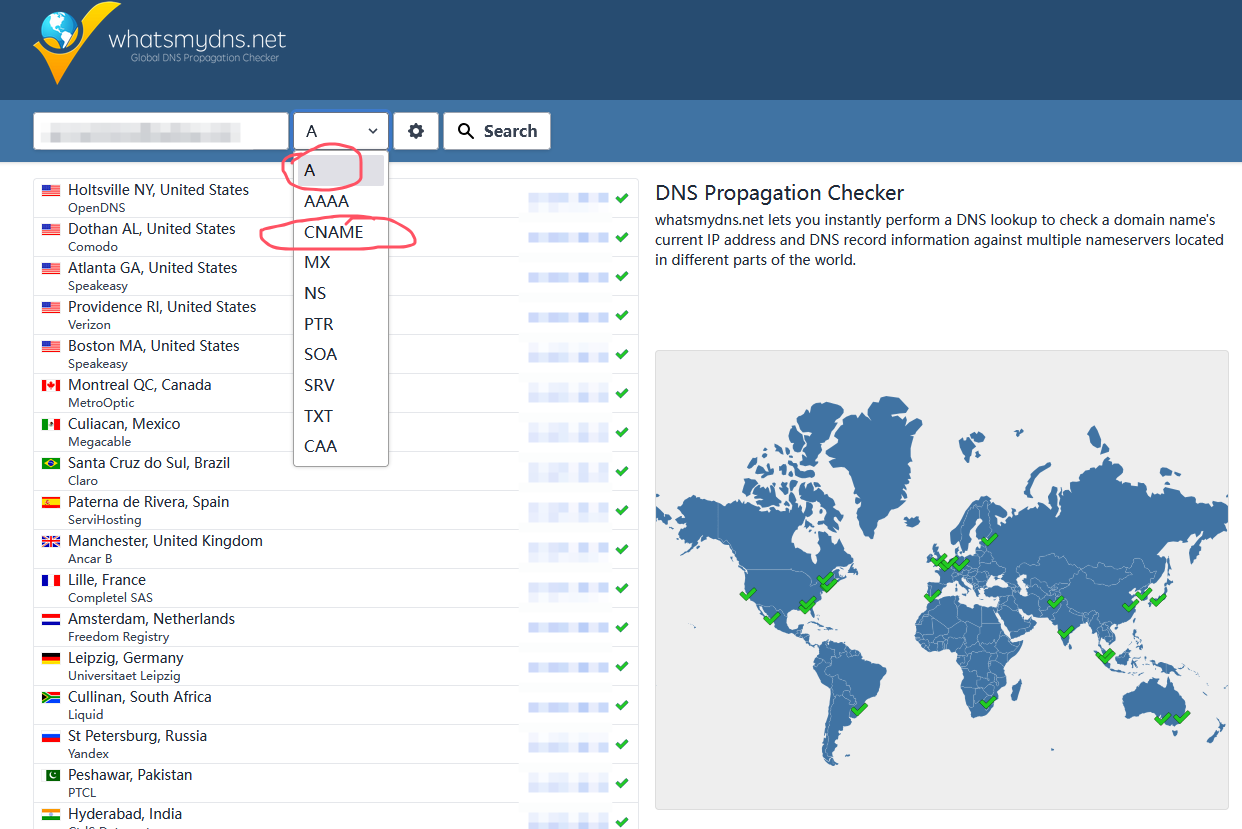
Visit: https://www.whatsmydns.net/
Enter Your Subdomain: Type in your full subdomain (e.g., account.your-store.com).
Check Records: Select both A and CNAME records.
Verify Results
Step 3: Configure the Subdomain in Shopify
With your DNS settings in place, set up the customer account subdomain in Shopify:
Navigate: Go to Settings > Customer accounts in your Shopify admin.
Manage URLs: Under Customer accounts > URLs, click Manage.
Enter Subdomain: Input the same subdomain string used earlier (e.g., account). This will create a URL like account.your-store.com for customer logins.
Continue: You are taken to the Connect existing domain page in the Domains settings.
Follow Instructions: If prompted, click Follow settings instructions to revisit your domain provider’s settings.
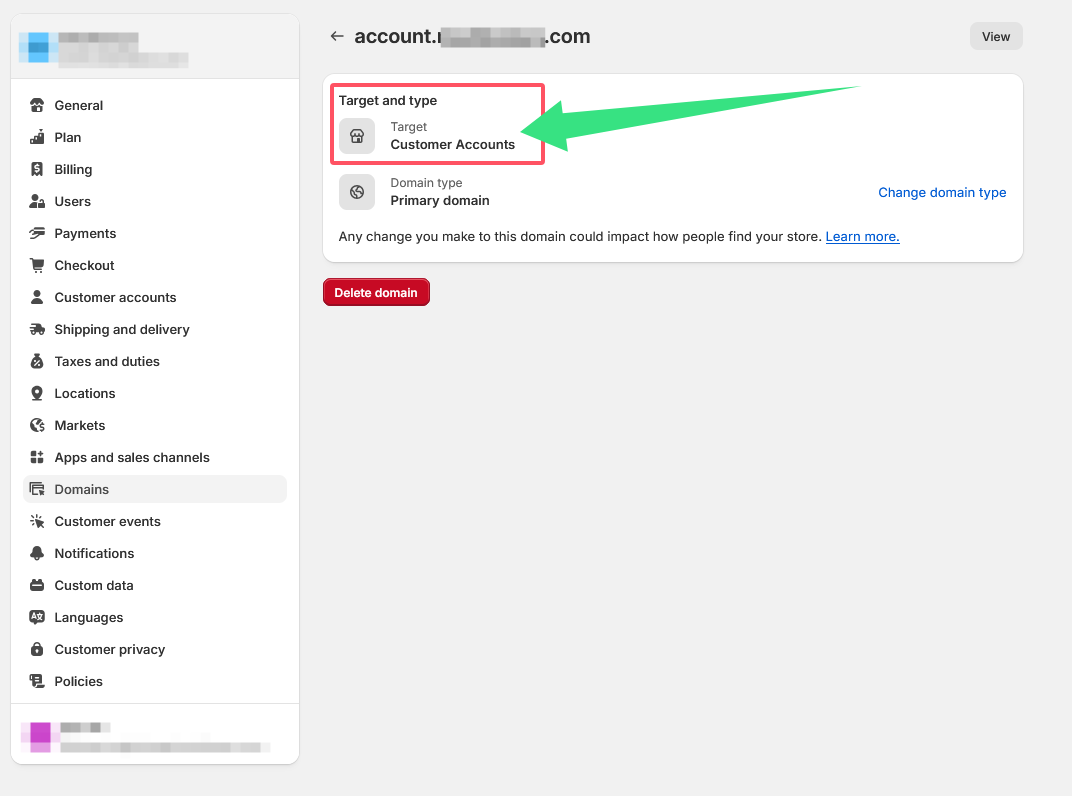
Note: Ensure the Target value is set to Customer Accounts to guarantee proper functionality.
Step 4: Verify the Connection
Finalize the setup by verifying the connection:
Verify Connection: On the Connect existing domain page, click Verify connection.
Confirmation: Once verified, a Connected label will appear on the Customer accounts page.
🎉 Congratulations! Your customers can now access their account pages through your custom subdomain, enhancing their experience with a consistent and professional touch.
Final Thoughts
Customizing your customer account domain not only reinforces your brand identity but also builds trust with your customers. If you encounter any issues during this process, both Shopify and your domain provider offer support resources to assist you.
Happy selling!
For any questions or further assistance, please don't hesitate to reach out. Simply leave us a message, and we will respond to you as soon as possible. We're here to help and look forward to working with you!