Blog
 Anne
AnneIntroduction
In today’s fast-moving e-commerce world, visuals can make or break a sale. Custom product badges in your Shopify store are a smart way to spotlight special offers, new arrivals, or limited editions. They grab attention and guide customers through your product lineup with ease. This guide walks you through adding custom badges to your Shopify store using the Dawn theme, helping you boost sales and create a standout shopping experience.
Step 1: Set Up Custom Badge Metafield
First, let’s create a metafield—a dedicated spot to store badge images for your products.
Log into your Shopify admin and head to Settings > Custom data.
Under Products, click Add definition.
Configure your metafield:
Name: Custom Badge
Namespace and Key: this is auto populated
Type: Select File
Click Save to set it up.
![]()
Step 2: Upload Badge Images
With the metafield in place, it’s time to add badge images to your products.
Navigate to Products and choose a product.
Scroll to the Product metafields section.
Select or upload a badge image to the Custom Badge field.
Repeat for each product you want to highlight.
![]()
Step 3: Modify Theme Code to Display Badges
Before making any code modifications, always ensure you create a copy of the theme first. Test all your changes on this copy to confirm everything works perfectly before publishing it to the live theme. This precaution helps prevent any issues from affecting your main theme and keeps your work safe.
Now, let’s tweak your theme to show these badges on product pages.
Go to Online Store > Themes.
Locate your Dawn theme and select Actions > Edit code.
Open the Sections/card-product.liquid file (or a similar file in your theme).
Add the badge display code near the product image section.
{% if card_product.metafields.custom.badge %}
<div class="product-image-wrapper">
<img src="{{ card_product.metafields.custom.badge | file_url }}" width="100" height="50" alt="Custom Badge" class="custom-badge">
</div>
{% endif %} ![]()
Step 4: Add CSS Styling
Let’s polish your badges with some styling to match your brand.
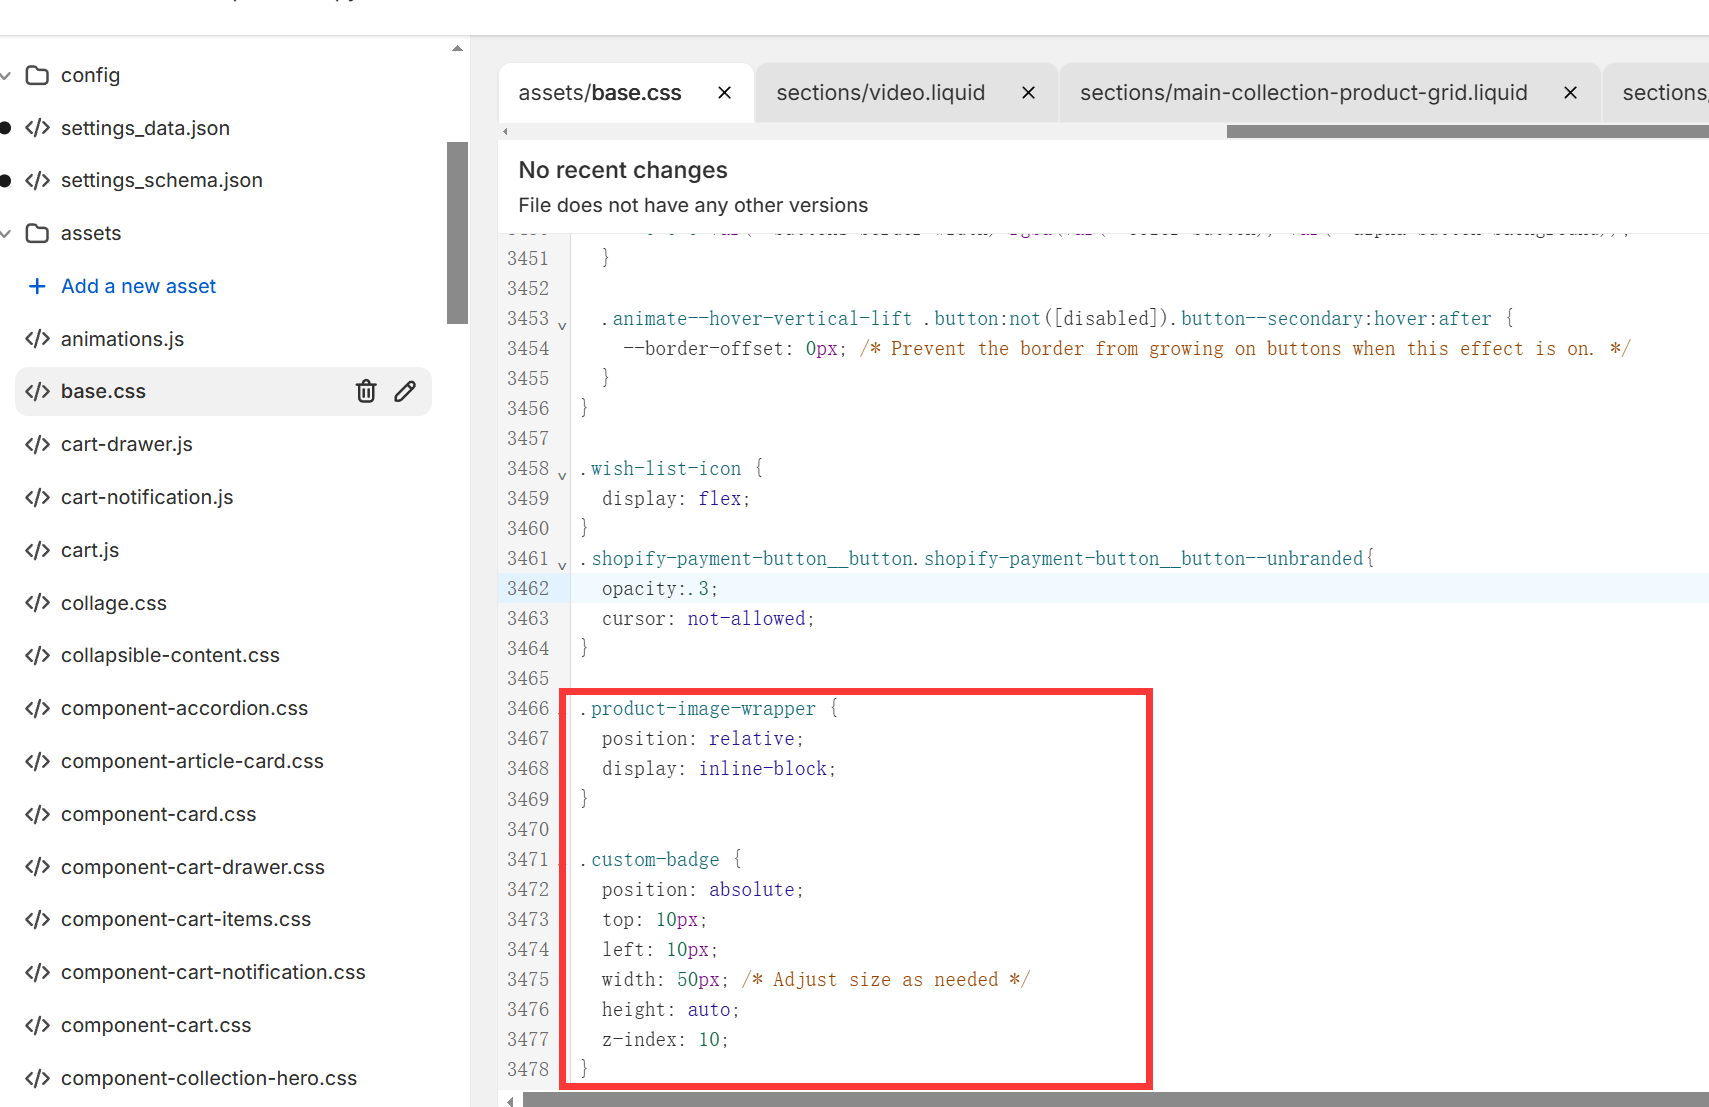
Open assets/theme.css or assets/base.css in the code editor.
Add the CSS code below to the bottom of the file.
.product-image-wrapper {
position: relative;
display: inline-block;
}
.custom-badge {
position: absolute;
top: 10px;
left: 10px;
width: 50px; /* Adjust size as needed */
height: auto;
z-index: 10;
} 
Step 5: Test and Publish
You’re almost done! Let’s test everything to confirm it works perfectly.
Save your changes and preview your store.
Check that badges display correctly. Adjust the CSS if needed.
By following these steps, you’ll integrate custom badges into your Dawn-themed Shopify store, enhancing engagement and driving sales.
Final Thoughts
Adding custom badges to your Shopify store is a quick, impactful way to level up the shopping experience and increase conversions. This guide equips you to highlight key product details, catch customer eyes, and shine in a crowded market. Whether it’s new arrivals, special deals, or limited editions, custom badges are your go-to tool for sales success. Get started today and take your Shopify store to new heights!
For any questions or further assistance, please don't hesitate to reach out. Simply leave us a message, and we will respond to you as soon as possible. We're here to help and look forward to working with you!