Blog
 Sonya
SonyaIf you're running a Shopify store with products available in different locations — maybe you’ve got multiple warehouses, physical stores, or you offer local pickup — giving your customers the option to filter products by location can seriously improve their shopping experience.
In this post, I’ll walk you through how to set up a location-based product filter using Shopify’s product metafields and the Search & Discovery app. It’s actually pretty straightforward, and it can make a big difference, especially for businesses that rely on regional availability.
Note: This setup is purely for filtering purposes — it doesn’t connect to Shopify’s actual inventory location system. If you need to manage stock by location (like warehouses or retail stores), you’ll want to configure that separately under Settings > Locations in your Shopify admin.
Why You Might Need a Location Filter
Let’s say you’re a retailer that has different inventory in multiple physical locations — maybe a chain of boutiques, or a few warehouses across the country. Or maybe you offer click-and-collect options where customers can buy online and pick up in-store.
In these cases, customers will want to know which products are available at which locations. Without a filter, they might get frustrated scrolling through items that aren't actually available to them. That’s where a location filter comes in — it helps customers find what they want faster and creates a smoother, more personalized shopping experience.
What You’ll Need
Before we dive in, make sure you have the following:
The Search & Discovery app installed (this is a free app by Shopify that lets you manage filters and search settings)
Access to product metafields
Step-by-Step: Add a Location Filter in Shopify
1. Create a Product Metafield for Location
First, you’ll need to define a new product metafield that stores location information for each product.
Go to your Shopify admin
Click on Settings > Custom data > Products
Create a new metafield definition
Name: Location
Type: Single line text (or list of values if products are available in multiple locations)
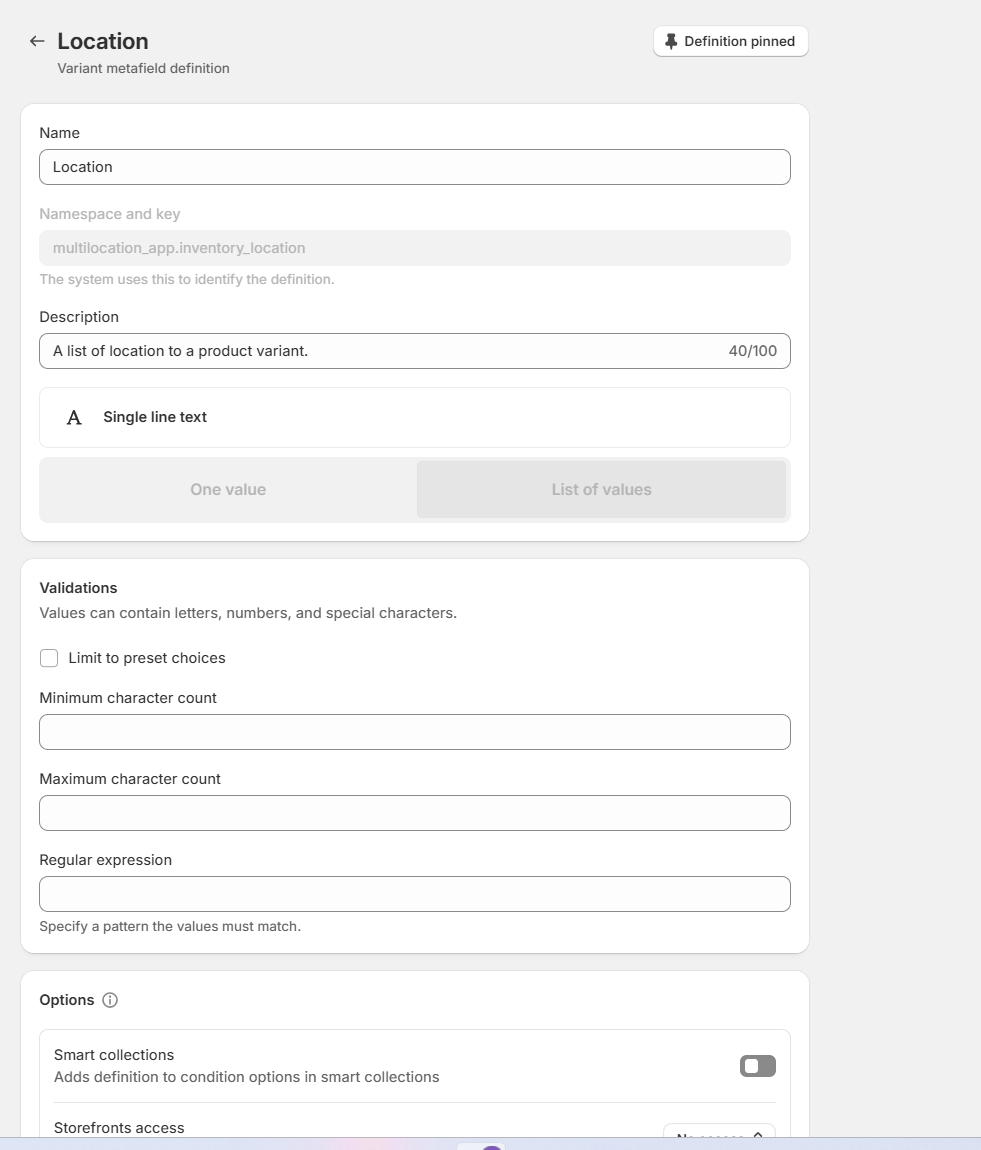
Make sure to save your new metafield definition.
2. Assign a Location Value to Each Product
Now that the metafield is set up, you’ll need to go into each product and assign a location.
Go to Products
Click on a product, then scroll down to the Metafields section
Enter the location value — for example: "New York", "Los Angeles", "Online Only", etc.
Save the product
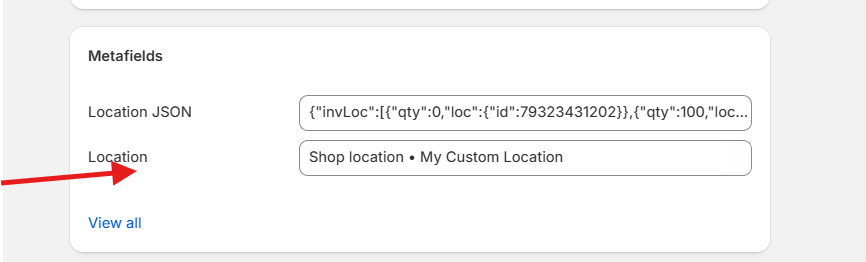
Repeat this step for all products that have different locations.
3. Add the Location Filter in Search & Discovery App
Now, let’s put that metafield to work.
Open the Search & Discovery app in your Shopify admin
Click Add filter
Select Location metafield you created earlier and select the filter values
Save your changes
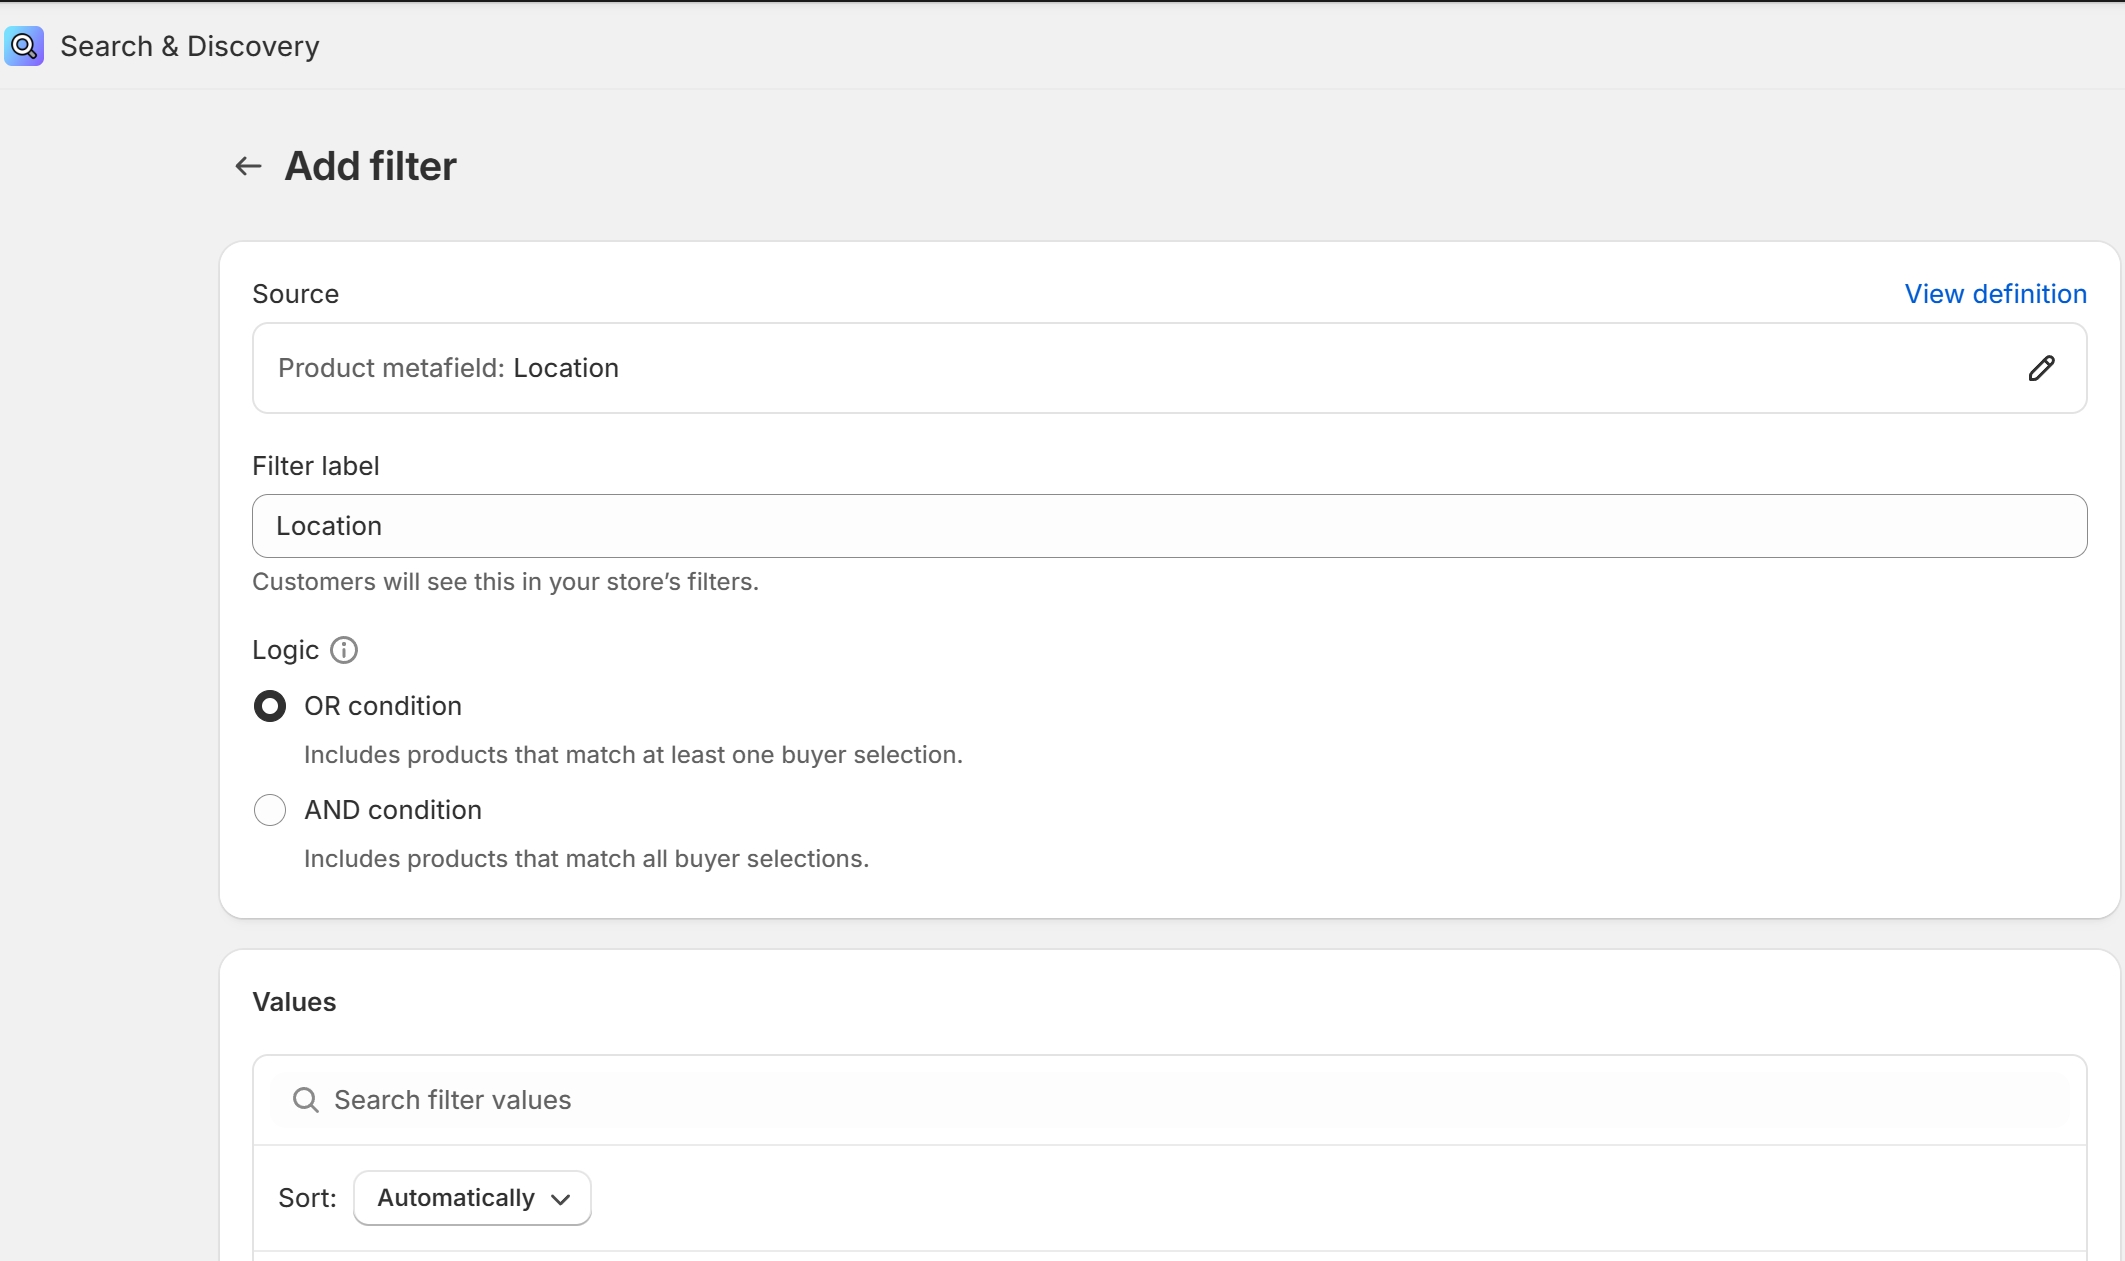
And just like that, your customers can now filter products by location directly from your storefront’s collection or search pages.
Final Thoughts
Adding a location filter might seem like a small feature, but it can have a big impact on the customer experience. For businesses with regional availability, it helps customers find products that are relevant to where they are — and that can lead to faster decisions, fewer returns, and more sales.
Plus, since this method uses metafields, it’s fully customizable — you could expand this idea to include availability by country, store name, shipping zone, and more.
If you're looking to take your store to the next level with more personalized filtering, give this setup a try.
For any questions or further assistance, please don't hesitate to reach out. Simply leave us a message, and we will respond to you as soon as possible. We're here to help and look forward to working with you!