Blog
 Anne
AnneWant to grow your Shopify store globally? Speaking your customers' language is the first step.
If you’re targeting international shoppers, adding multiple languages to your Shopify store not only improves user experience but also builds trust and increases conversion. In this article, we’ll walk you through how to set up and manage multiple languages in Shopify—from enabling new languages to translating your content with the right tools.
Step 1: Enable Additional Languages in Shopify
Before adding any translations, you first need to enable the languages you want your store to support:
Go to your Shopify Admin.
Click Settings > Languages.
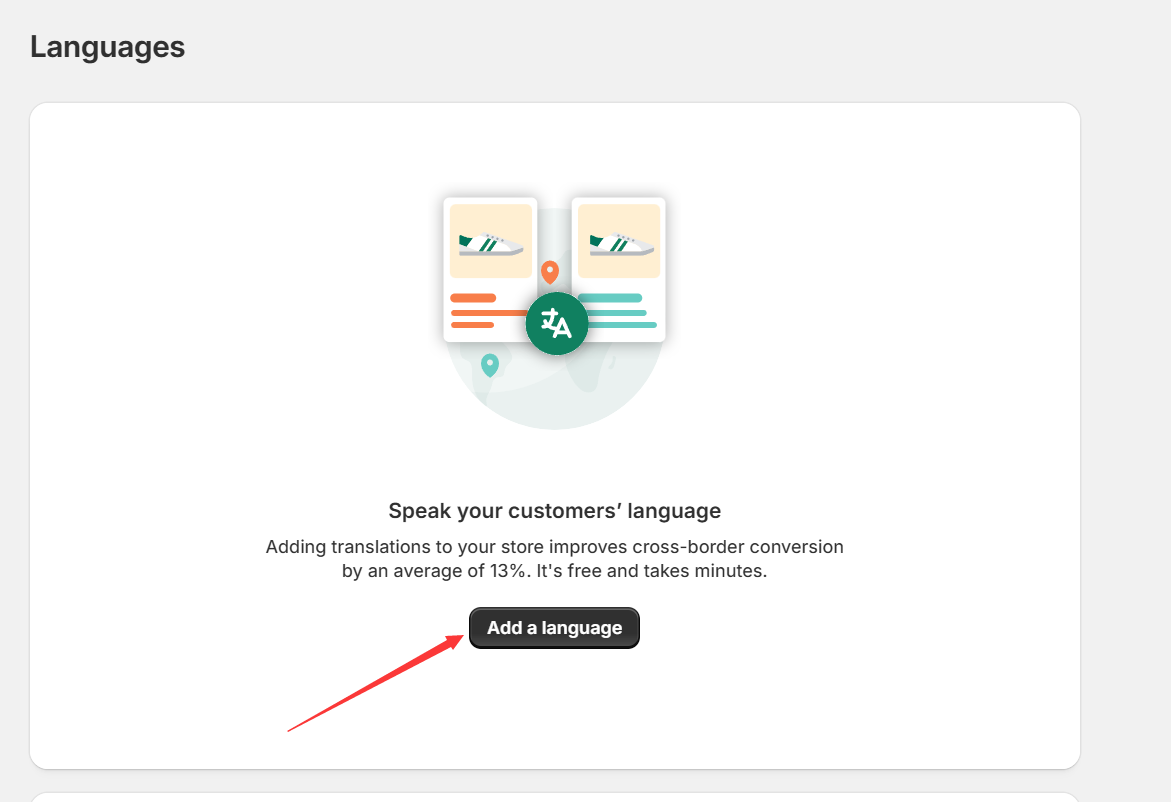
Click Add language, then select the languages you want to offer.
Click Publish next to each language you want to go live.
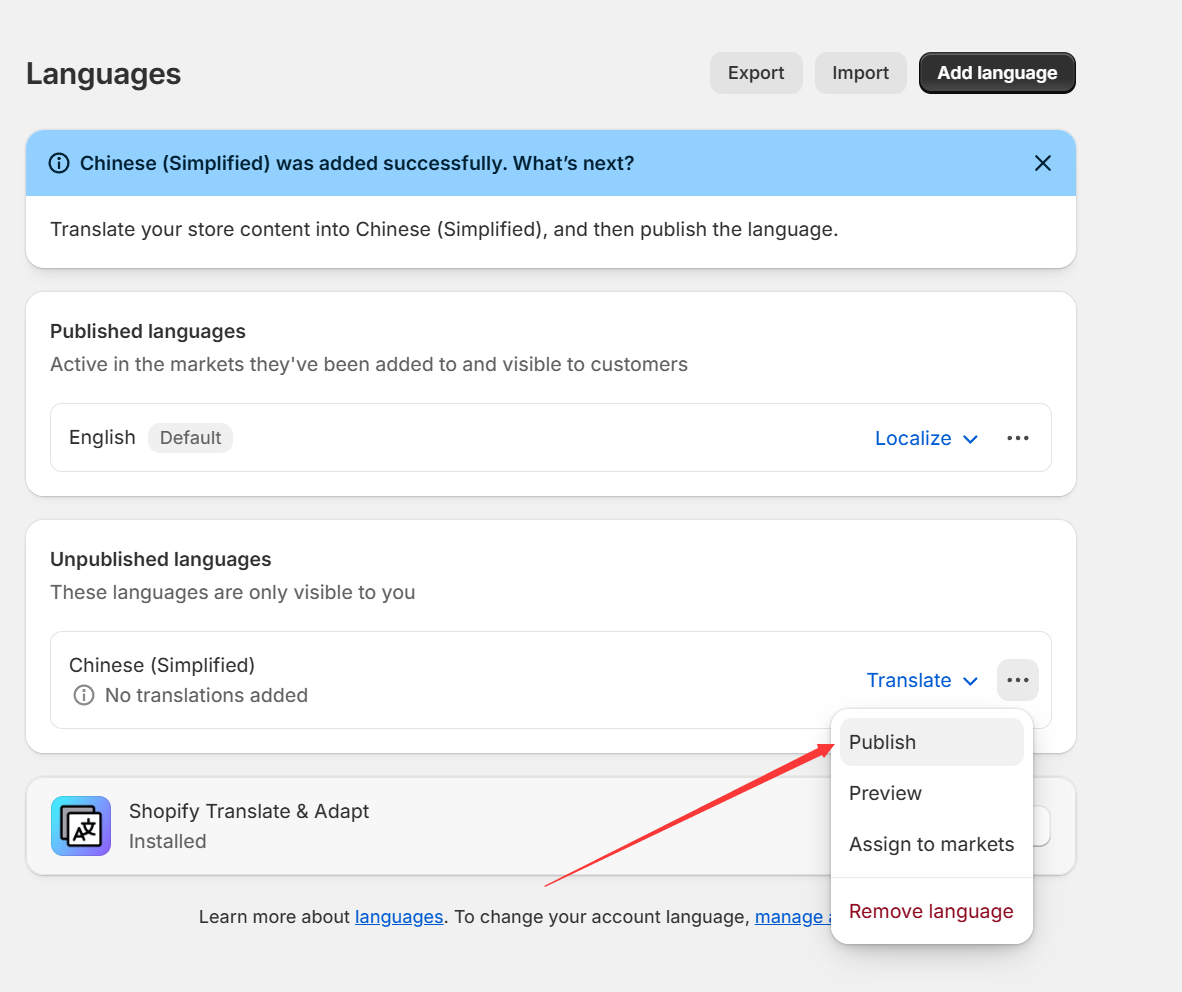
This activates the basic framework needed for your translations to display properly.
Step 2: Install a Translation App
Shopify does not automatically translate your store’s content. To manage translations effectively, you’ll need to install a dedicated app from the Shopify App Store.
Here are a few popular options:
Translate & Adapt (by Shopify) – Free, built-in support for both manual and automatic translation.
Langify – Known for strong SEO and customizable translations.
Weglot – Fast setup and high-quality translations, great for non-technical users.
Once installed, these apps allow you to start translating various elements of your storefront.
![]()
Step 3: Translate Store Content
Depending on the app you use, you’ll typically be able to translate the following:
Product titles and descriptions
Collection names
Navigation menus
Blog posts and articles
SEO metadata and page titles
Checkout text (depending on the app and Shopify plan)
![]()
![]()
If you're using Translate & Adapt, you can toggle between automatic translation and manual editing—ideal for maintaining your brand tone in every language.
✨ Pro tip: Even with automatic tools, always review key content manually for clarity and tone.
Step 4: Add a Language Switcher
Once your translations are in place, make it easy for customers to select their preferred language:
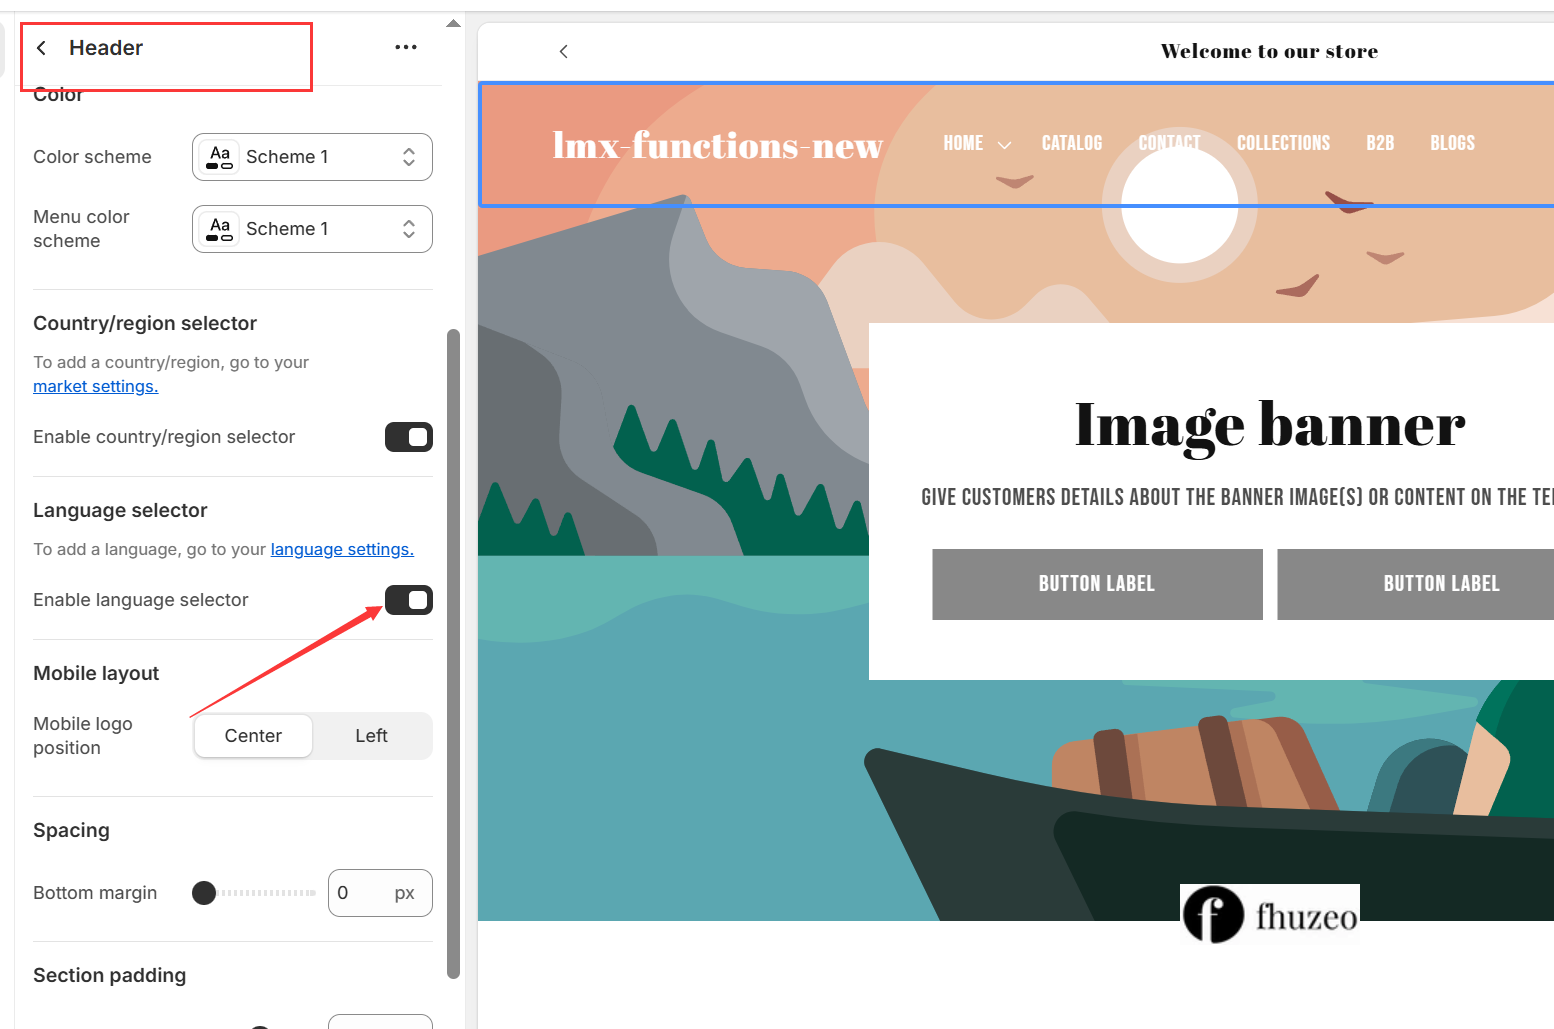
Go to Online Store > Themes > Customize.
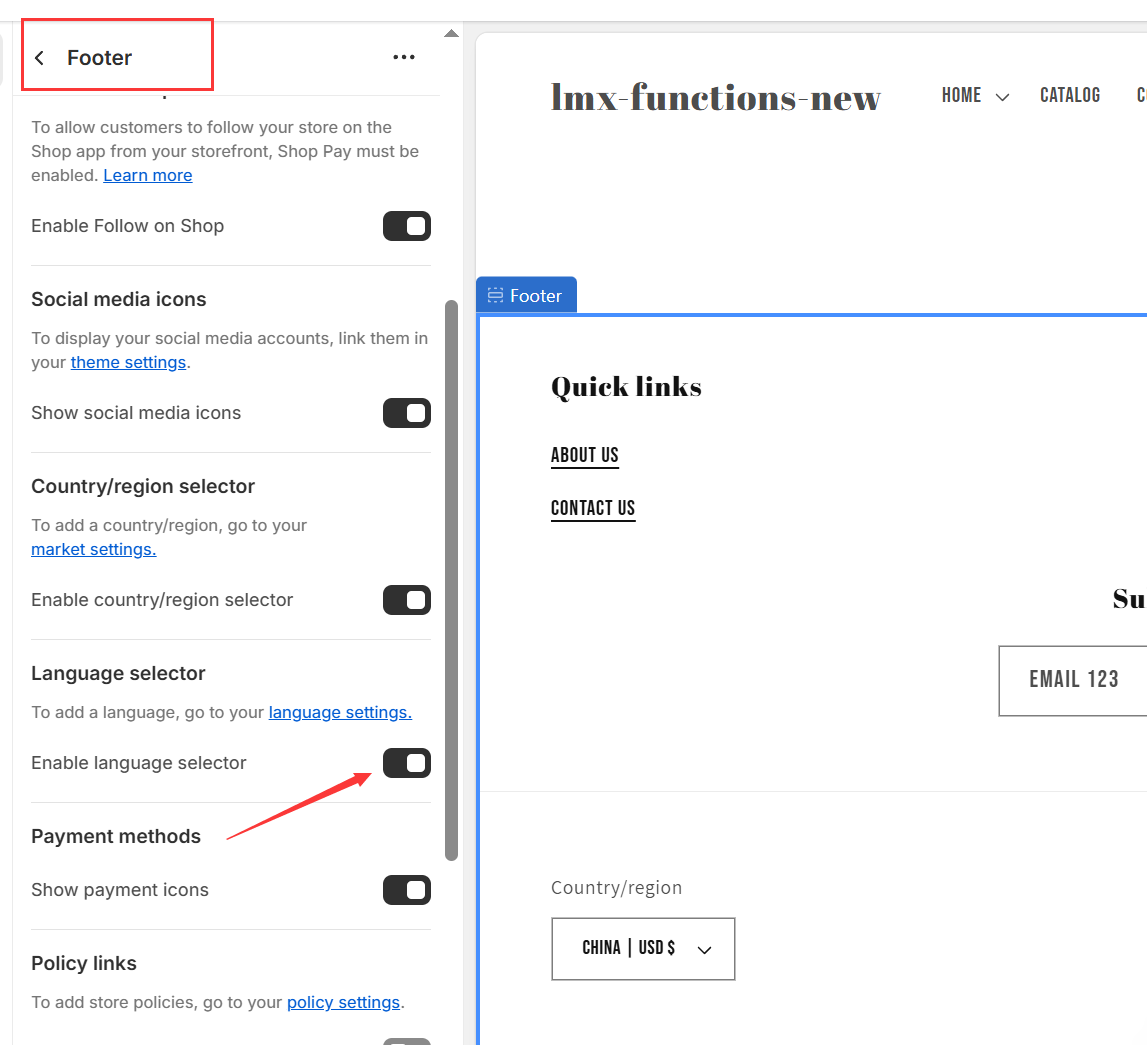
In the theme editor, add a Language Selector to your header, footer, or navigation.
Save your changes.
Now, visitors can switch languages instantly on your storefront.
Final Tips for Managing a Multilingual Shopify Store
Double-check auto-translations: Automatic translation isn’t always perfect—especially for product descriptions or brand messaging.
Localize banners/images: If you use text within images, consider creating localized versions.
Improve multilingual SEO: Some apps support multilingual URLs (e.g.,
/fr,/es), which helps your store get indexed by search engines in different regions.Use Shopify Markets for full localization: You can also localize currency, pricing, and shipping options per region with Shopify Markets.
Technical Note: hreflang Tags Are Automatically Added
When you publish multiple languages, Shopify automatically adds <link rel="alternate" hreflang="..."> tags to your store’s <head> section. This helps search engines understand which language versions of your content to show.
Example:
<link rel="alternate" hreflang="en" href="https://yourstore.com/en" />
<link rel="alternate" hreflang="fr" href="https://yourstore.com/fr" />
<link rel="alternate" hreflang="x-default" href="https://yourstore.com" />You can inspect this using browser developer tools to confirm the tags are in place.
Setting up multiple languages may take some initial effort, but the reward is worth it: a more inclusive, globally accessible Shopify store that speaks to your customers—wherever they are.
For any questions or further assistance, please don't hesitate to reach out. Simply leave us a message, and we will respond to you as soon as possible. We're here to help and look forward to working with you!